Unx Documenter (UnxDoc) can do more than extract universe metadata into Excel — it can also compare extracted snapshots and highlight what has changed between universe versions. This is useful for change reviews, environment promotions (DEV → TEST → PROD), and audits where you need a paper trail of differences.
This article walks through the diff workflow end to end.
When to use the diff feature
- Compare the same universe across environments (e.g. DEV vs PROD) to confirm a promotion is consistent.
- Compare two versions of the same universe over time (e.g. before and after a change request).
- Compare many universes in one go — for example, every universe in a folder — matched automatically by CUID or by name.
In every case the inputs are Excel files previously produced by UnxDoc’s extract step. UnxDoc does not connect to the BO server during diffing — it only reads the .xlsx files.
Mode A — Two Files
Step 1 — Extract the baselines
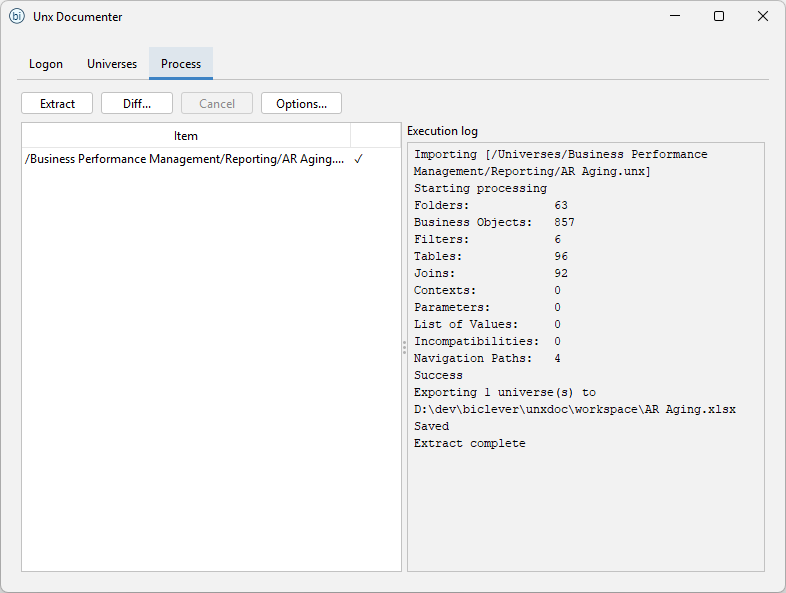
Before diffing, produce the Excel files you want to compare. Log on, select the universes, and run Process → Export result as you would for normal documentation.
Save each export with a meaningful name (e.g. finance_dev.xlsx, finance_prod.xlsx). The diff output is more readable when the file names clearly identify the source.
Step 2 — Open the Diff dialog
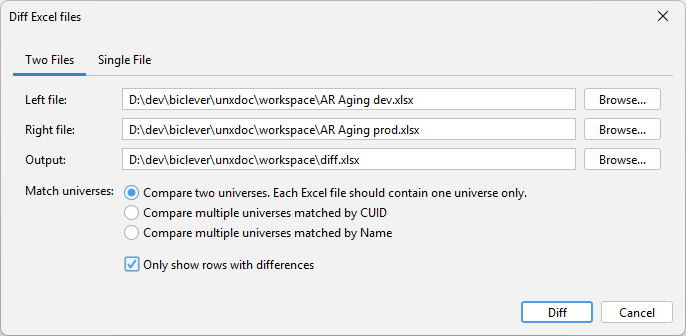
From the main window, choose Diff Excel files. The dialog has two tabs covering the two diff modes.
Use this tab when you have two separate Excel exports to compare.
Fields:
- Left file / Right file — the two
.xlsxfiles to compare. By convention put the older or “expected” version on the left, and the newer or “actual” version on the right. - Output — where the diff workbook will be written. Defaults to
diff.xlsxin your workspace. - Match universes — controls how universes inside the files are paired:
- Compare two universes. Each Excel file should contain one universe only. — pair the single universe in each file directly. Use this for one-to-one comparisons.
- Compare multiple universes matched by CUID — pair universes by their CMS CUID. Best for environment promotions where the same universe is published to multiple environments.
- Compare multiple universes matched by Name — pair universes by name. Use when CUIDs differ (e.g. universes copied between unrelated systems) but the names line up.
- Only show rows with differences — when checked, the output workbook hides rows that match in both files, leaving only the differences. Leave unchecked to see the full metadata side-by-side with differences highlighted.
Step 3 — Review the diff workbook
Click Diff to generate the output. UnxDoc writes an Excel file with one sheet per metadata category (Objects, Tables, Joins, Parameters, LOVs, Contexts, Navigation Paths, Incompatibilities). Differences are highlighted with colour coding so you can scan changes quickly.
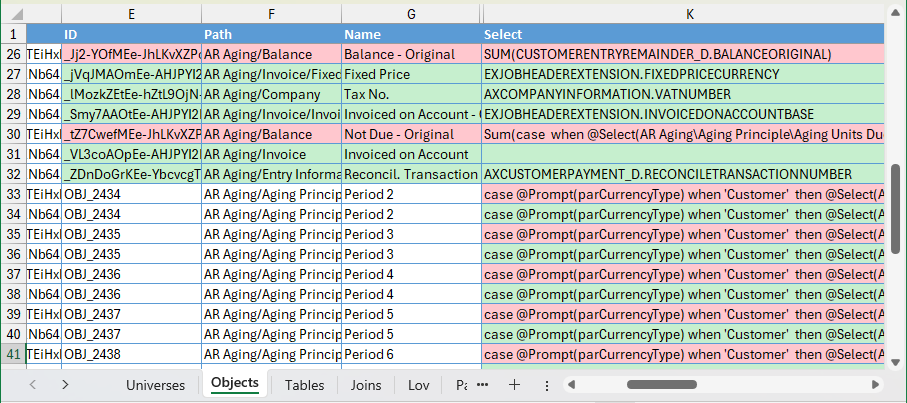
Typical patterns:
- Modified rows show the left value and the right value side-by-side, with the differing cells highlighted.
- Added rows appear only in the right file.
- Removed rows appear only in the left file.
Filter by category sheet, sort by change type, and use Excel’s standard tooling to drill into specific differences.
Mode B — Single File
This mode is useful when you work in one environment and want to compare a modified universe against another version of itself. Instead of producing two separate Excel exports and then diffing them, you extract both versions into a single workbook and let UnxDoc pair them up for you.
Step 1 — Extract both versions into one file
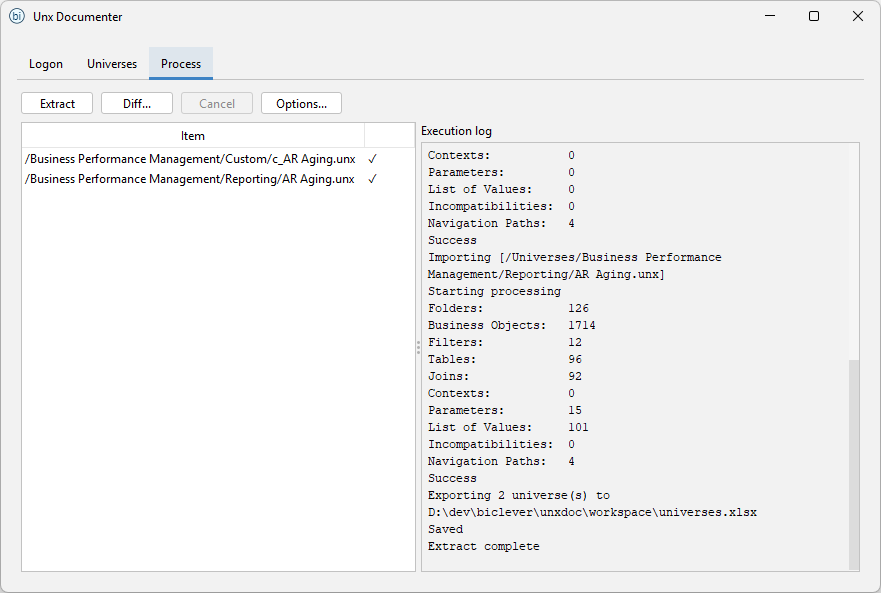
On the extract screen, select the two versions of the universe you want to compare and run Process → Export result. Both versions land in the same .xlsx file.
Step 2 — Open the Diff dialog and switch to Single File
From the main window, choose Diff Excel files and switch to the Single File tab.
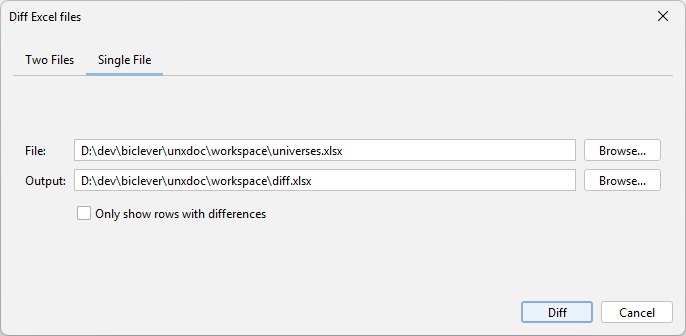
Point the dialog at the workbook you just produced. Universes inside the file are matched by CUID. The output and “only show differences” options behave the same way as in Two Files mode.
Click Diff to generate the output workbook — review it the same way as described in Step 3 above.

